29+ slip stitch with yarn in back
Sl1Pwyib Slip next stitch. And then theres slipping a stitch with yarn in back.

Pin On Quick Saves
Sl1Pwyif Slip next stitch.

. If the yarn is not already in back of the work move the yarn between the needles to back of the work as if a knit stitch were about to be worked. When working a stitch with yarn. Slipping a stitch purlwise.
How to slip a stitch knitwise with yarn in back. Heel turn you will still be working flat You should be ready to work a WS row now. Yarn should be in the back unless otherwise specified.
Then take the sides and fold them in ward. One Size Hat Finished Circumference About 20 in. Purl 3 Slip 1 knitwise with yarn in back Knit 1 repeat to last 3 stitches knit 3.
Finished Height About 10 in. Purlwise with yarn held in front of work. Pin the top of it as youre working.
Click here to know more about it. Purl 3 Knit 1 slip 1 knitwise with yarn in back repeat to last 3 stitches knit 3. Pull the yarn through leaving about 4.
It literally means that you bring your yarn to the back of the work. WYIF most often used on a purl row. Repeat 12 for total of 12 times should be able to count 12 slip stitches at beginning of rows Repeat row 1 once more.
Slip 1 stitch purl-wise with the yarn held in the front M1. Slip the next stitch purlwise onto the right needle. Slip 1 purlwise with yarn in back.
To insert your needle knitwise insert it as if you were going to knit. With yarn in front slip first 2 sts as if to purl bring yarn to back and knit across to last 2 sts bring yarn to front slip last 2 sts as if to purl. To slip a stitch purlwise you are going to place your needle into the next stitch on the LH needle as if to purl and then transfer the stitch to your RH needle.
Insert your right hand needle into the first stitch on the left hand needle as if to knit. M1 Make 1 stitch by picking up. Wyif slip 1 pw P13 P2TOGP1turn.
The back Sl1 wyif. Slip 1 stitch knit the next stitch pass the slip-ped stitch over the knit one. Slipping a stitch purlwise keeps it in the same position or mount on the needle and is the most common way to slip a stitch.
Without making a yarn over transfer the stitch onto your right needle. Intermediate Level 3 SIZE. You are now ready to proceed with the next st as instructed.
Cowl is knit flat and then seamed. Work the 1st 2 sts and last 2 sts as follows. Yarn requirements will vary.
On all WS Rows. Knit 3 purl across. With your yarn in the back put your RH needle through the stitch on the LH needle from back to front as if you were going to.
How to Knit SL2 wyib Slip 2 stitches with yarn in back Christy Hills. Yarn Over Slip Stitch Crochet Tutorial The yarn over slip stitch yo sl st creates a beautiful ridge that sort of mimics knitting that you can use to add decorative flair to your crochet fabric. Free Knitting Pattern from Lion Brand Yarn Lion Brand Homespun Thick Quick Tweedy Slip Stitch Hat And Scarf Pattern Number.
Yarn should be in the back unless otherwise specified. Wyib slip 1 pw knit across turn. Wyif slip 1 pw Purl 1 repeat to end turn.
Now your right needle is inserted into the first stitch on your left needle. 40 Votes When purling your working yarn is in the front. Garter stitch with a double strand of yarn.
Knitting into back of loop. Edge stitches The first and last stitch of every row are. A circular needle is used to accommodate the large number of sts.
Always slip all other stitches purlwise with yarn positioned as indicated in the pattern. 24 circular size US 13 stitch markers. RS Right side.
Purlwise with yarn held in back of work. Learn how to do a Slip Stitch With Yarn in Back s1wyib with Planet Purls video taught by Beth Moriarty author of Deep South Knitting. The abbreviation is really quite straightforward.
Slip the stitch off the left hand needle onto the right hand needle. This video is showing how-to knit SL2wyib stitch which is used in my Two Colors Checks Baby Booties knitting pattern. Use it to create a tight ribbing for a hat to create textured interest in your scarves and wraps or whatever you can dream up.
To slip a stitch purlwise you are going to place your needle into the next stitch on the LH needle as if to purl and then transfer the stitch to your RH needle. Now thread your yarn needle. If you want to make a slip purlwise insert your needle as if you were going to purl.
Sl1k and sl1p are the official abbreviations as given by the Craft Yarn Council but slk and slp are commonly used. Loop lying before next stitch and. The With Yarn in Back instruction abbreviated as wyib is found generally in pattern where you slip a stitch.
Wyib Or you can slip a stitch with yarn in front. Front and back are directional in relation to your knitting position in front of or in back of the needles rather than the right side and wrong side of the work. Instructions for making a scarf instead are included in the directions.
This instruction is used to distinguish points in your pattern where the yarn would normally be held in the front of. 45 105 Views. This creates the new st.
Wyif and wyib refer to the position of. Work back and forth on the circular needle as if working on straight needles. Place the arm warmer with the right side facing down.
Knit next 2 stitches. 51 cm will stretch to fit a range of sizes. The tutorial below will give you the basics but check out our NEW slip stitch tutorial with videos here.
Bring yarn to front between the needles. With CA C0 37 sts or a multiple of 6 sts 13. Always slip first stitch of each row knitwise with yarn in back.
Knit 3 Purl 29. If the yarn is not already in back of the work move the yarn between the needles to back of the work as if a knit stitch were about to be worked. When working a stitch with yarn in front the yarn should be coming to the front of the work which is the side facing up towards you.
Return the yarn to the position it. The front and back in these instructions refer to which way your fabric is currently facing it is independent of the Right Side or Wrong Side of your knitted fabric. Increase one stitch by lifting the chain between sts onto the left needle and knitting it through the back loop.
To sl1 wyib on the purl side you will move your working yarn to the back betweenthe needles slip the next stitch purlwise from LH to RH needle then move the working yarn to the front again between the needles to carry on purling. The abbreviations related to slipping stitches. Start sewing by threading your needle through the purl bump closest to the edge then put your needle through the purl bump closest to the edge on the opposite side.
Take yarn to back over the right needle. With your yarn in the back put your RH needle through the stitch on the LH needle from back to. Slipping a stitch purlwise.
Sts Stitches WS Wrong side.

Pin On Free Christmas Crochet Patterns

Pin On Szydelkowanie
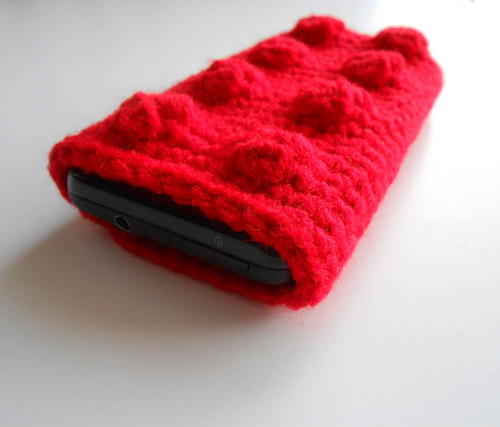
Crochet Lego Phone Case Allfreecrochet Com

Easy To Make Crochet Vest Crochet Vest Pattern Crochet Vest Pattern Free Crochet Vest

Crochet Joni Topper Sewrella Crochet Vest Pattern Crochet Fashion Black Crochet Dress

Open Stitch Crocheted Vest Pattern Pattern By Hilde Fuchs Crochet Vest Pattern Free Crochet Vest Pattern Vest Pattern Free

Leprechaun Mask Template Printable Halloween Masks Leprechaun Honey Bee Cartoon

Toggle Button Cardigan By Veronika Cromwell In Deramores Studio Dk In 2022 Crochet Sweater Dress Crochet Cardigan Pattern Men Sweaters Pattern

Pin On Amigurumi Rag Doll Crochet E Idee Da Trasporre

Mesh Vest Crochet Vest Pattern Crochet Sweater Crochet Vest

Patterns And Baby Nursery Items By Bbadorables On Etsy Crochet Patterns Crochet Lamb Pattern Crochet
Newborn Boy Romper Crochet Free Pattern Google Search Newborn Crochet Patterns Crochet Baby Clothes Crochet Baby Patterns

Rustyzipper Com Vintage Clothing Crochet Sweater Vest Vest Pattern Crochet Vest Pattern

Pin On Crochets

Pin On Free Crochet Pattern Collections